Homemade Cashew Macadamia Nut Milk (Easy Recipe)


In this article, you’ll learn how to easily make homemade cashew macadamia nut milk. If you’re looking for a guide on how to make delicious, creamy, and customizable plant milk, you’ve come to the right place!

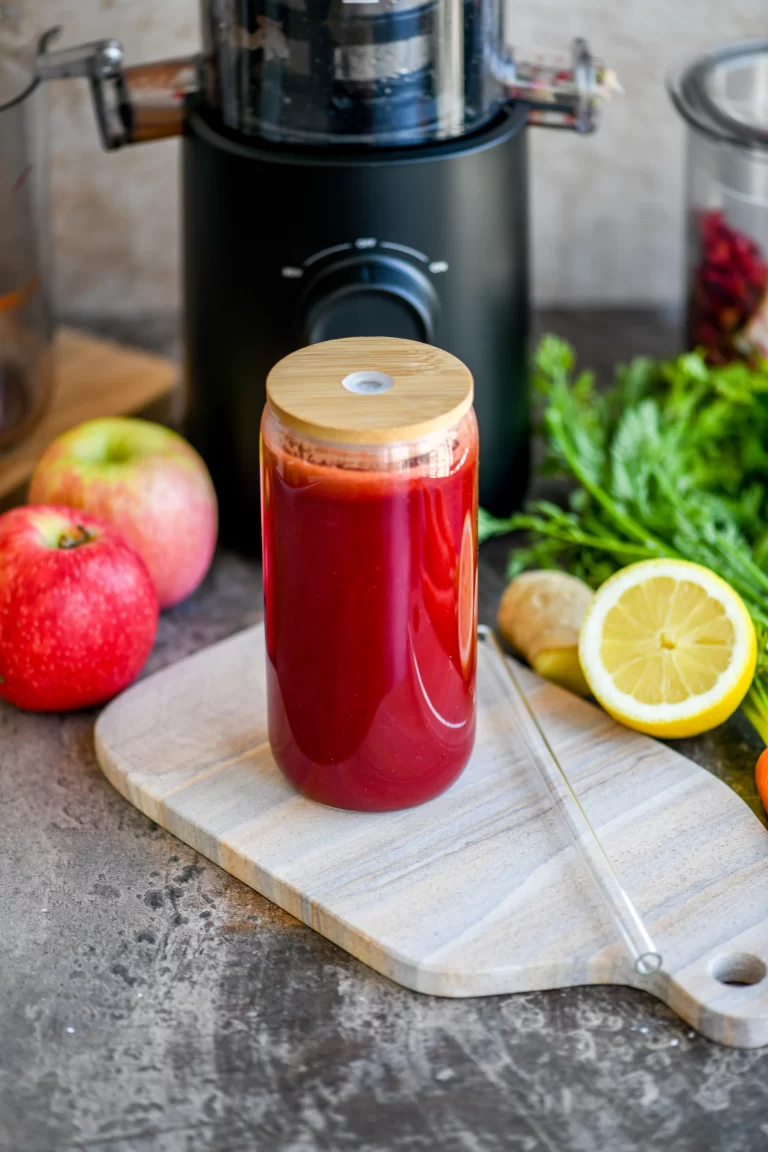
NOTE: The easiest way to make nut milk at home is to use a cold-press juicer, but we’ve also included an alternate way using a blender and nut milk for those who may not have a juicer. For an express version, we’ve additionally included a plant milk maker recommendation.
Cashew & Macadamia Nut – The Perfect Creamy Combo

Cashews are an excellent alternative to dairy, which is why they’re so often used in plant-based mac’n cheese recipes and make for the creamiest vegan ice cream. When used in plant-milk, they help achieve a creamier result and highly customizable plant milk option. Macadamia nuts additionally complement cashews perfectly, making this milk even creamier, while not being too overpowering in terms of taste.
Ingredients You’ll Need

- Raw Cashews: make sure your cashews are raw and unsalted!
- Raw Macadamia Nuts: macadamia nuts can be on the pricier side, so feel free to simply use more cashews and/or add a different kind of nut (such as walnuts, or almonds). In case of a tree nut allergy, you can use sesame or hemp seeds instead.
- Water: filtered and fresh water is best.
- Optional Flavors: you can add vanilla extract or any other flavors (such as cacao powder) to your liking.
- Optional Sweeteners: to make the nut milk sweeter, add a little maple syrup or coconut nectar.
Recommended Equipment
There are three ways to make nut milk at home, each using different equipment. We’ve outlined all three in the recipe instructions below. In this section, you’ll find a list of recommended equipment for each method:
A Cold-Press Juicer (Easy & Convenient Method)

Our absolute favorite cold-press juicer is the Nama J2 Cold-Press Juicer, which is ideal for making fresh juice, nut milks, and sorbet. You can read our full review of the J2 juicer here. If you’re currently looking for a new juicer, you can use the discount code “BOV10” at checkout for 10% OFF this or any other Nama Juicer. (NOTE: THE J2 JUICER IS ON SALE UNTIL AUGUST 4th → USE “BOV80” for $80 OFF; For 10% OFF all other Nama Products, use “BOV10”)
TIP: The Nama J3 Juicer is the travel-sized version of the Nama J2 Juicer, which is more affordable than the J2 and ideal for small kitchens, traveling, and single households.
A Blender & Nut Milk Bag (Most Affordable Method)
For this method, you’ll need a blender and a nut milk bag. If you don’t have a blender, here are our top 3 recommendations (by budget):
- Under $100: Nutribullet Blender
- Under $200: KitchenAid K150 Blender
- Higher Budget & Quality: Nama C2 High-Speed Blender & Juicer


A Plant Milk Maker (Quickest & Most Practical Method)
By far the quickest, easiest & most practical way to make nut milk (or any other kind of plant milk) is by using a Plant Milk Maker like the Nama M1 Plant-Based Milk Maker. Investing in one makes sense if you’re planning on making homemade plant milk regularly.

How to Make This Recipe (Step By Step)
The following is a step by step overview of how to make this recipe (with images). For a recap, be sure to refer to the recipe card below.
Step One: Soak the Cashews & Macadamia Nuts

Tip: ideally do this the night before making the nut milk
Place the nuts in a large jar or bowl, fill with water until all nuts are covered, but leave a little extra space as they will swell up a but while soaking. Cover with a lid, then place in the fridge for at least 4 hours, ideally overnight. Note: you could let the nuts soak at room temperature as well, but nuts and seeds get rancid quite quickly when not cooled, so we’d recommend refrigerating them.
Step Two: Strain the Soaked Cashews and Macadamia Nuts and Add Fresh Water

Next, transfer the nuts to a bowl (or use the same jar/bowl as before) and add a fresh batch of filtered water. The amount used will depend on the creaminess and consistency you’re going for. I’d recommend using anywhere from 1 to 3 cups of water per dry cups of nuts use:
- 1:1 ratio: using 1 cup of water per 1 cup of nuts will yield the thickest and creamiest result, which is ideal if you’re planning on using it in coffee.
- 2:1 ratio: using 2 cups of water per 1 cup of nuts is best for drinking the nut milk and/or using it in smoothies or shakes.
- 3:1 ratio: using 3 cups of water per 1 cup of nuts will yield the thinnest result and it’s also the most cost effective option. This is great for cereal and similar uses.

Bottom Line: if you’re unsure, I’d recommend starting with either 1 or 1.5 cups of water per cup of nuts to see how you like the consistency. You can always add more later on.
Step Three: Start Making Your Cashew & Macadamia Nut Milk
METHOD 1: WITH A JUICER

Turn on your juicer, then ladle the nuts and water into the hopper little by little. It doesn’t have to be exact, but try using enough water with each portion of nuts added.

The juicer will start making the milk right away. The whole process will only take a few short minutes.


METHOD 2: WITH A BLENDER & NUT MILK BAG
To make this recipe with a blender and nut milk bag, follow the exact same steps as above, but instead of ladling the nuts and water into your juicer’s hopper, add everything to your blender (work in batches if need be). Blend at the highest speed, until smooth. Next, place your nut milk bag over a large bowl.
Pour or ladle the blend into the bag (working in batches). Ones the nut milk bag is about 1/3 to 1/2 filled, close it with your clean hands and press the bottom of the bag to extract the nut milk. Remove the pulp and repeat the process. After that, proceed to customize your cashew & macadamia nut milk.
METHOD 2: WITH A PLANT-BASED MILK MAKER
For this method, you can skip soaking the nuts entirely. Simply add the dry nuts, water, and desired add-ons (sweeteners and flavors) to your Plant Milk Maker and press start. Your plant milk will be ready in just 60 seconds (note: the exact instructions and time will depend on the brand and model of plant-based milk maker you’re using.)
Step Four: Customize Your Cashew & Macadamia Nut Milk

You can enjoy your cashew and macadamia nut milk as is, but if you’d like to customize it, feel free to mix in sweeteners such as maple syrup and/or flavors like vanilla extract.
Step Five: Enjoy and/or Store Your Freshly Made Nut Milk

Enjoy your milk right away with some freshly baked cookies, pour it over cereal, or use it in coffee or smoothies. To store it for later use, transfer it to a glass bottle or jar with an airtight lid and keep it in the fridge for up to 3-4 days. Be sure to shake it well before consuming.
Recipe Tips & Notes
What to do with the Nut Milk Pulp

The pulp extracted when making the nut milk lends itself perfectly to be used in both sweet and savory recipes. You can use it in baked goods (instead of almond milk, for instance), savory muffins, etc. If you’re not planning on using it right away, but don’t want to waste it, you can store it in the freezer.
Additional Tips & Customization Ideas
For addition tips on how to make nut milk with a juicer, be sure to read this article, which additionally includes suggestions for different kinds of nuts, add-ons, and sweeteners to use.
Recipe Card
Use this recipe card to save, pin, or print this recipe. For additional information and step by step photo instructions, be sure to read the full article above.

Homemade Cashew Macadamia Nut Milk (Easy Recipe)
Ingredients
- 3/4 cup raw cashews
- 1/2 cup macadamia nuts
- 2 cups water - adjust the amount for your preferred consistency and creaminess, see notes
Instructions
- Soak the nuts in water for at least 4 hours (ideally overnight) in a covered mason jar or bowl in the fridge.
- Strain and (optionally) rinse the nuts, then add them to a medium to large bowl and add fresh water.
- Turn on your juicer and, using a ladle, add a the water and nuts to the juicer's hopper little by little.
- Mix in your desired add-ons and sweeteners (such as maple syrup and vanilla extract) to taste and enjoy! (See notes for storage tips and alternate methods using a blender or plant milk maker)
Equipment

Notes
- The amount of water added depends on your desired consistency and creaminess. Here’s a quick guide:
- 1:1 ratio: using 1 cup of water per 1 cup of nuts will yield the thickest and creamiest result, which is ideal if you’re planning on using it in coffee
- 2:1 ratio: using 2 cups of water per 1 cup of nuts is best for drinking the nut milk and/or using it in smoothies or shakes.
- 3:1 ratio: using 3 cups of water per 1 cup of nuts will yield the thinnest result and it’s also the most cost effective option. This is great for cereal and similar uses.
- To make this recipe with a nut milk bag and blender or with a plant-based milk maker, be sure to read this section in the article above.
Please note that this site contains affiliate links and we may earn a commission if you make a purchase through those links at no extra cost to you.
Did you love this recipe? Please consider leaving a comment and a ⭐️⭐️⭐️⭐️⭐️ star rating below. Thank you!
SAVE/PIN/SHARE THIS RECIPE

More Vegan Recipes You Might Like
If you enjoyed this recipe, you might also like the following vegan recipes.

- Vegan White Chocolate & Cashew Cookies: With crisp edges and a gooey, chewy centre, these cookies from Holly Jade‘s Baking Book are exquisite. All you need to serve them with is an ice-cold glass of your favorite dairy-free milk for dunking.
- How to Make Nut Milk with a Juicer: Your step-by-step guide on how to make nut milk using a juicer.